Advertisement
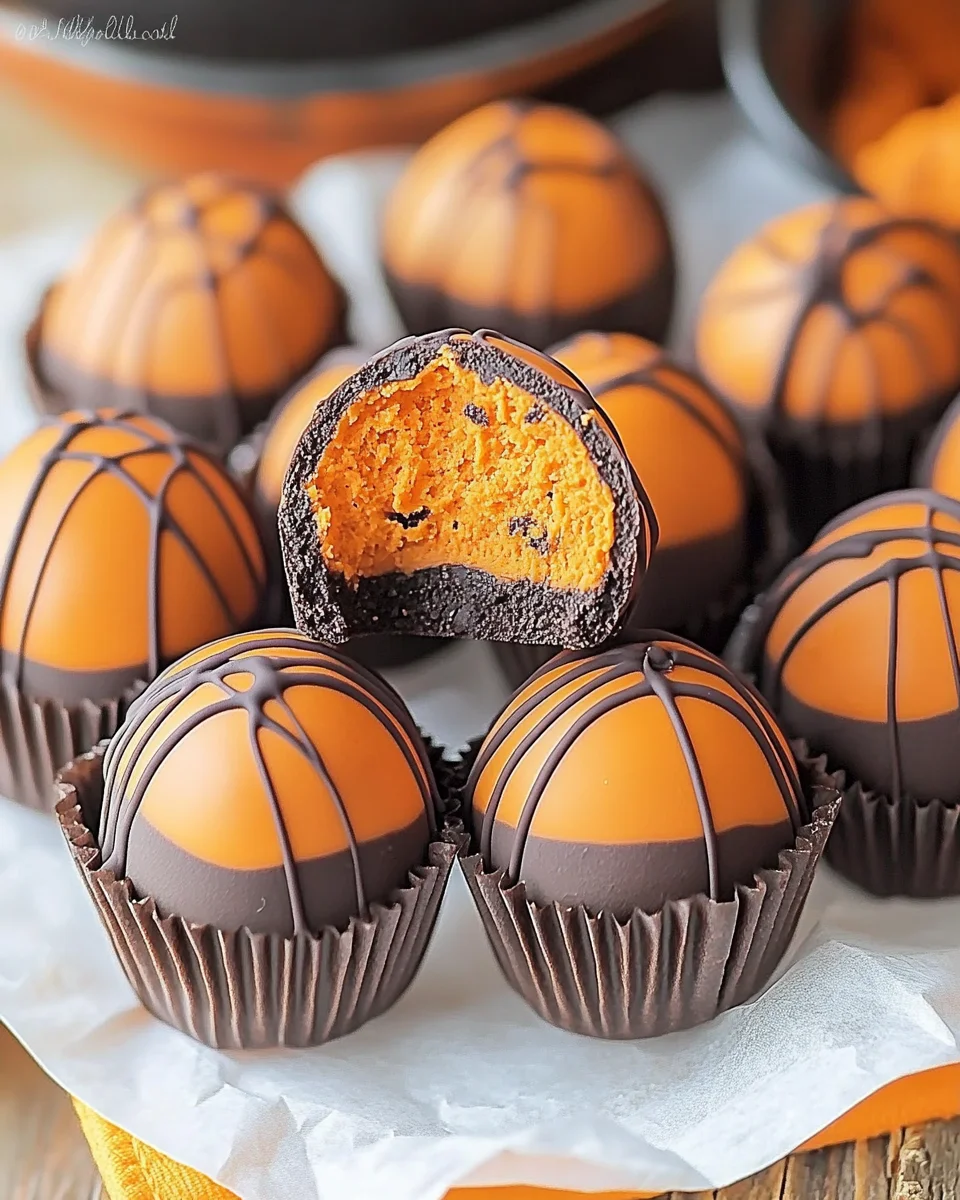
Thanksgiving is a time for gratitude, laughter, and, of course, indulgent treats. If you’re looking for a dessert that’s both easy to make and bursting with seasonal flavors, pumpkin Oreo balls are the perfect choice. These bite-sized delights combine the rich taste of Oreos, the warm essence of pumpkin spice, and a creamy white chocolate coating, creating a dessert that’s sure to impress your guests.
Why Pumpkin Oreo Balls Are Perfect for Thanksgiving
Pumpkin Oreo balls are a delightful twist on the classic Oreo truffle. They’re:
Advertisement
- Easy to make with just a few simple ingredients.
- Festive and fun with flavors that embody the spirit of Thanksgiving.
- Perfect for sharing, whether you’re hosting or attending a gathering.
- Customizable, so you can add your personal touch.
Ingredients You’ll Need
Here’s a quick guide to the ingredients required to make these treats. Use this table to keep everything organized:
| Ingredient | Quantity |
|---|---|
| Oreo cookies | 1 package (15 oz) |
| Cream cheese (softened) | 8 oz |
| Pumpkin puree | 1 cup |
| Pumpkin pie spice | 1 tsp |
| White chocolate chips | 2 cups |
| Coconut oil | 1 tbsp |
How to Make Pumpkin Oreo Balls
Step 1: Crush the Oreos
- Place the Oreo cookies in a food processor and pulse until fine crumbs form.
- If you don’t have a food processor, you can place the cookies in a zip-top bag and crush them with a rolling pin.
Step 2: Mix the Filling
- In a large mixing bowl, combine the crushed Oreos with the softened cream cheese.
- Stir in the pumpkin puree and pumpkin pie spice until the mixture is smooth and well blended.
Step 3: Shape the Balls
- Scoop out small portions of the mixture using a spoon or cookie scoop.
- Roll each portion into a ball, about 1 inch in diameter.
- Place the balls on a baking sheet lined with parchment paper.
Step 4: Chill the Balls
- Refrigerate the shaped balls for about 30 minutes to firm them up.
- This step is crucial to ensure the balls hold their shape during the dipping process.
Step 5: Melt the White Chocolate
- In a microwave-safe bowl, combine the white chocolate chips and coconut oil.
- Heat in 30-second intervals, stirring in between, until the chocolate is completely melted and smooth.
Step 6: Dip and Coat
- Use a fork or dipping tool to lower each chilled ball into the melted white chocolate.
- Ensure the ball is fully coated, then lift it out and let the excess chocolate drip off.
- Place the coated ball back on the parchment-lined baking sheet.
Step 7: Set the Chocolate
- Allow the coated balls to sit at room temperature or refrigerate them until the chocolate hardens.
- Once set, your pumpkin Oreo balls are ready to serve!
Tips for the Best Pumpkin Oreo Balls
- Use room-temperature cream cheese: This makes it easier to mix with the crushed Oreos.
- Don’t skip the chilling step: Chilling the balls ensures they’re firm and easier to dip.
- Customize the toppings: Add a drizzle of melted dark chocolate or sprinkle crushed nuts on top for extra flair.
- Store properly: Keep the balls refrigerated in an airtight container to maintain their texture and flavor.
Nutritional Information
Here’s an approximate nutritional breakdown per ball (based on 24 balls):
| Nutrient | Amount |
|---|---|
| Calories | 110 |
| Total Fat | 6g |
| Saturated Fat | 4g |
| Carbohydrates | 13g |
| Sugar | 9g |
| Protein | 1g |
FAQs About Pumpkin Oreo Balls
1. Can I use a different type of chocolate? Yes, you can use milk or dark chocolate instead of white chocolate for a different flavor.
2. Can I make these ahead of time? Absolutely! Pumpkin Oreo balls can be made up to 3 days in advance and stored in the refrigerator.
3. Are there any substitutes for coconut oil? You can use vegetable shortening or butter as a substitute for coconut oil when melting the chocolate.
4. Can I freeze Pumpkin Oreo balls? Yes, you can freeze them in an airtight container for up to 2 months. Thaw in the refrigerator before serving.
5. What if I don’t have pumpkin pie spice? You can make your own by mixing cinnamon, nutmeg, ginger, and cloves in equal parts.
6. How should I serve these at a gathering? Arrange the balls on a decorative platter or skewer them with toothpicks for easy serving.
Why Pumpkin Oreo Balls Are a Must-Try for Thanksgiving
Advertisement
These pumpkin Oreo balls are more than just a dessert; they’re a conversation starter. The combination of creamy pumpkin filling, crunchy Oreo crumbs, and smooth chocolate coating creates a treat that’s both elegant and irresistible. They’re bite-sized, making them perfect for mingling during gatherings or as part of a dessert buffet.
Get Started on Your Thanksgiving Treats
Ready to make these delicious pumpkin Oreo balls? Gather your ingredients and get started! Whether you’re hosting Thanksgiving dinner or looking for a fun activity to do with your family, these treats are sure to be a hit. Share them with your loved ones and create sweet memories this holiday season. Happy baking!
Print
Pumpkin Oreo Balls for Thanksgiving
- Total Time: 50 minutes
- Yield: 24 Balls
Description
Delight your guests this Thanksgiving with Pumpkin Oreo Balls! These bite-sized treats combine crushed Oreos, creamy pumpkin, and warm spices, all wrapped in a luscious white chocolate coating. Simple to make and absolutely irresistible, they’re perfect for festive gatherings or gifting.
Ingredients
- 1 package (15 oz) Oreo cookies
- 8 oz cream cheese, softened
- 1 cup pumpkin puree
- 1 teaspoon pumpkin pie spice
- 2 cups white chocolate chips
- 1 tablespoon coconut oil
Instructions
- Crush the Oreos
- Place Oreo cookies in a food processor and pulse until fine crumbs form.
- Alternatively, place cookies in a zip-top bag and crush them with a rolling pin.
- Mix the Filling
- In a large mixing bowl, combine the crushed Oreos with softened cream cheese.
- Add pumpkin puree and pumpkin pie spice, mixing until smooth and fully combined.
- Shape the Balls
- Scoop out small portions of the mixture and roll them into 1-inch balls.
- Place the balls on a baking sheet lined with parchment paper.
- Chill the Balls
- Refrigerate the balls for 30 minutes to firm them up.
- Melt the White Chocolate
- Combine white chocolate chips and coconut oil in a microwave-safe bowl.
- Heat in 30-second intervals, stirring in between, until fully melted and smooth.
- Dip and Coat
- Use a fork or dipping tool to lower each chilled ball into the melted white chocolate, ensuring it is fully coated.
- Let excess chocolate drip off, then place the coated ball back on the parchment-lined sheet.
- Set the Chocolate
- Let the chocolate coating harden at room temperature or refrigerate until firm.
- Serve or Store
- Once set, serve immediately or store in an airtight container in the refrigerator.
Notes
- Use room-temperature cream cheese for easier mixing.
- Customize with toppings like crushed nuts, sprinkles, or a drizzle of dark chocolate.
- These can be made up to 3 days in advance and stored in the refrigerator.
- For longer storage, freeze in an airtight container for up to 2 months.
- Prep Time: 20 minutes
- Cook Time: 30 minutes
- Category: Dessert
- Method: No-Bake
- Cuisine: American

